[ad_1]
When you’re a small business owner, you have to wear many hats, especially in the beginning. One of those hats has you continually maintaining and upgrading your website. In that capacity, you know a content delivery network (CDN) will speed up your site. However, installing one is complicated.
Isn’t it?
Wrong.
Some CDN’s do have complex implementation sequences, but others are as simple as boiling an egg. There’s an obvious sequence of actions you need to complete, but each one is easy and quick.
The sequence below relates to implementing an Incapsula CDN on any domain.
Signing Up
A good quality CDN uses expensive hardware such as solid state disks (SSDs), the latest super-fast CPUs and the fastest Internet connections. Each of these costs money.
A free CDN won’t compare to a paid one, and the monthly charges for a good one start at around $59 per month. However, that is a small price to pay for the increased conversions your faster site will give you.
Incapsula offers a free trial, but you do need to give your credit card details. If things don’t work out, though, just cancel the pending payment.
We lay out the entire, step-by-step CDN implementation process in the screenshots below from Incapsula.
Start by clicking on the green “Pricing & Sign Up” button and choose the level of CDN cover you need.
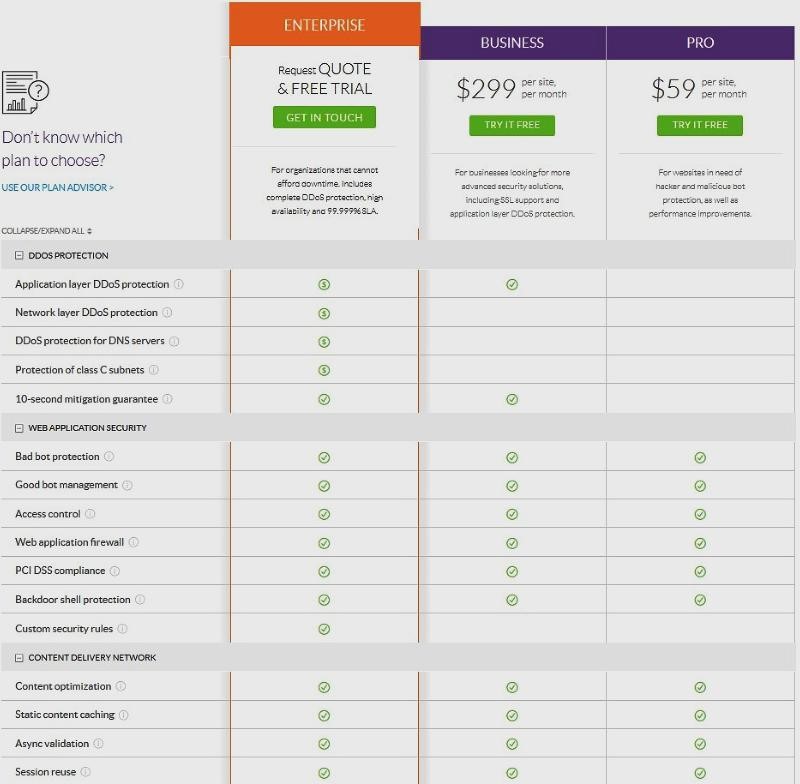
If you click on the PRO plan, the next screen asks for your name, email address, and company details.
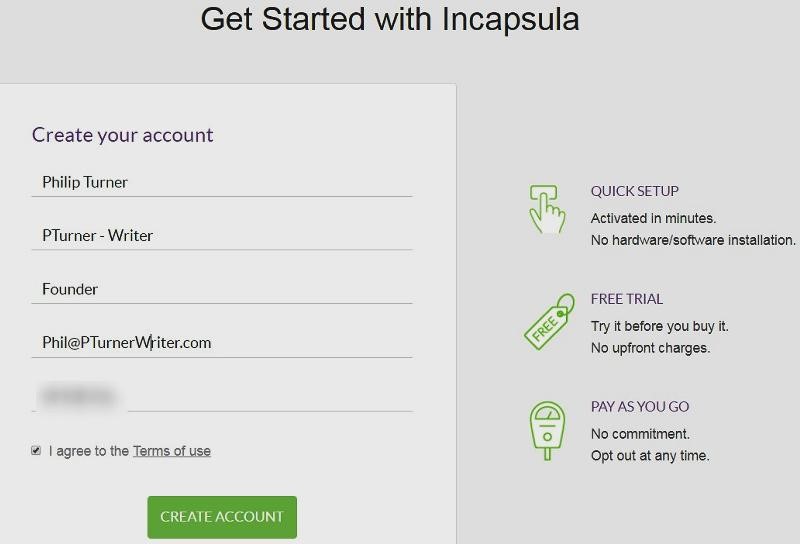
When you click on the “Create Account” button you are taken to the screen below to fill in your credit card details.
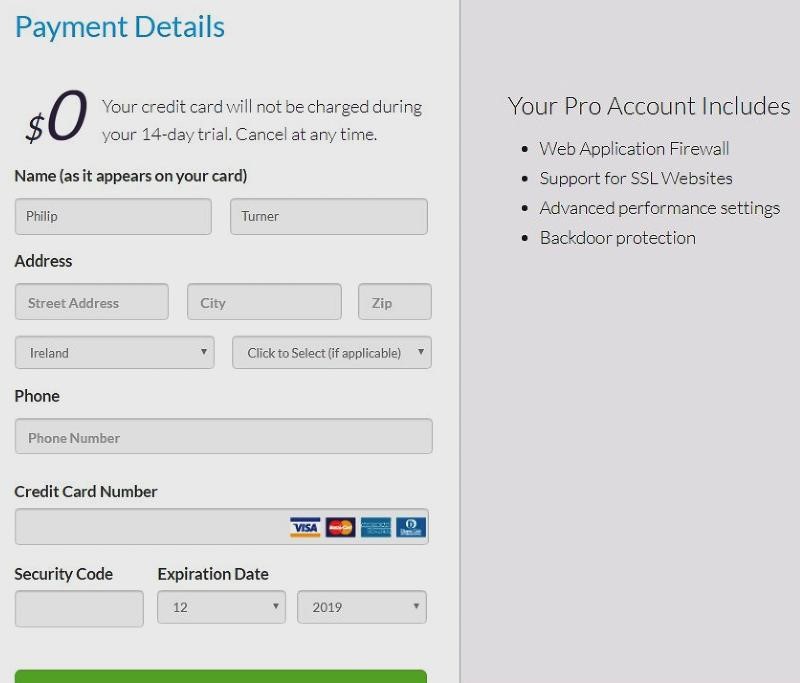
Enter your card details and press the big green button. Provided you have enough unused credit on your card, you will be directed to the screen where you will enter your domain name.
Adding Your Site
Adding your site to any CDN has a few more steps than most company sites reveal in their marketing.
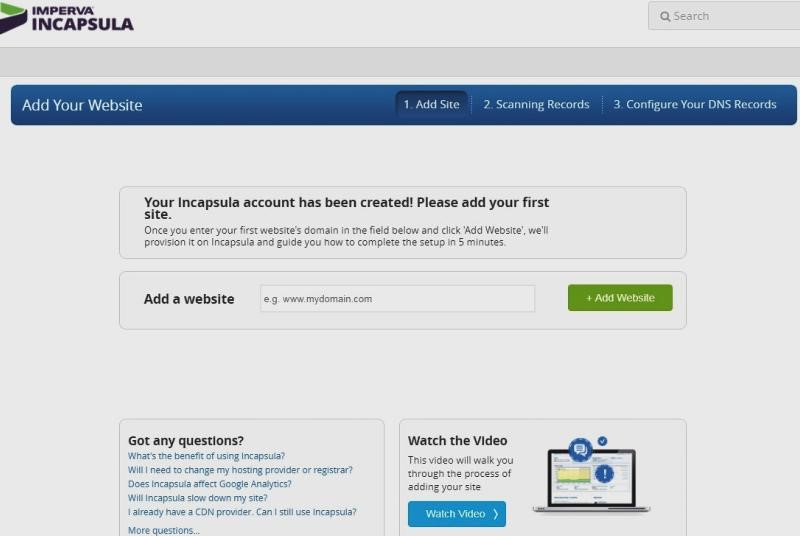
Type in a domain name you own and press the green button to add the site to your Incapsula account. Just add one domain at this stage, or things will get too complicated.
Incapsula tells you what is happening.
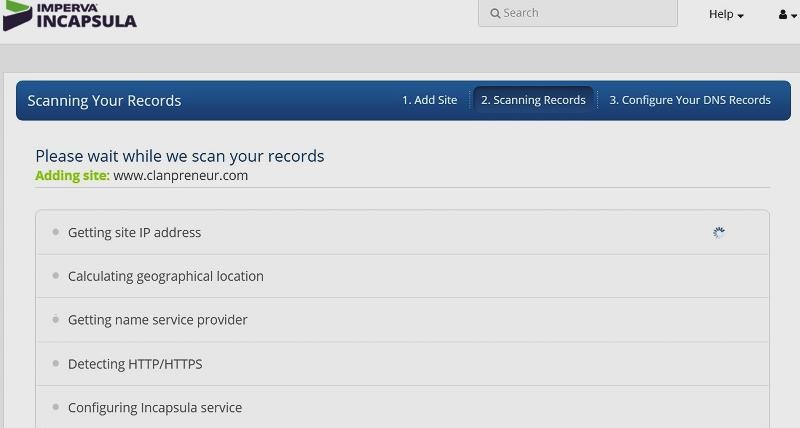
You will see a message on the next screen about verifying your identity using the email address you gave when you signed up.
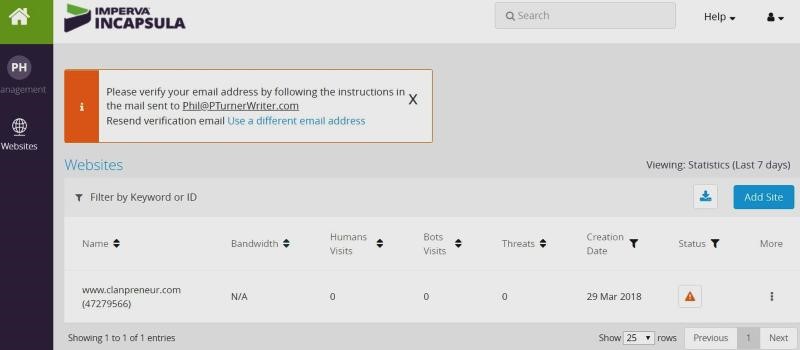
Click on the link in the email that Incapsula sent you.

Clicking the link clears the ID verification message.

Click the orange triangle under “status,” and you start a sequence that will set up your site on Incapsula.
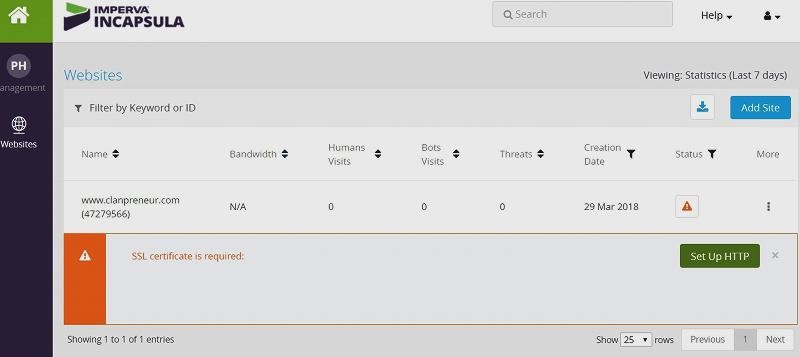
Now, click on the green “Set up HTTP” link.
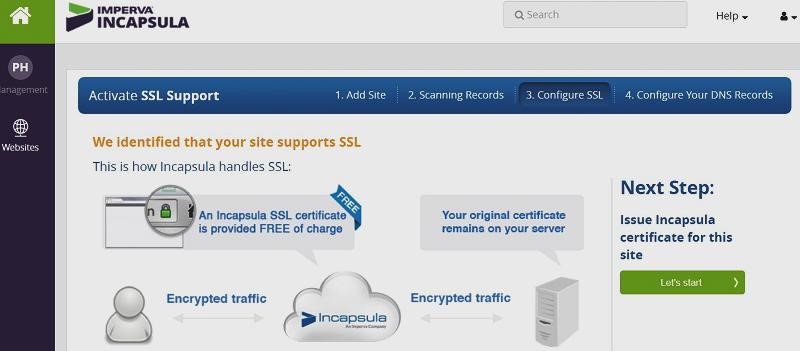
Click on the friendly-looking green “Let’s start” button. And you get the rather unfriendly looking screen below. Never fear, Click the green “Check DNS” button anyway.
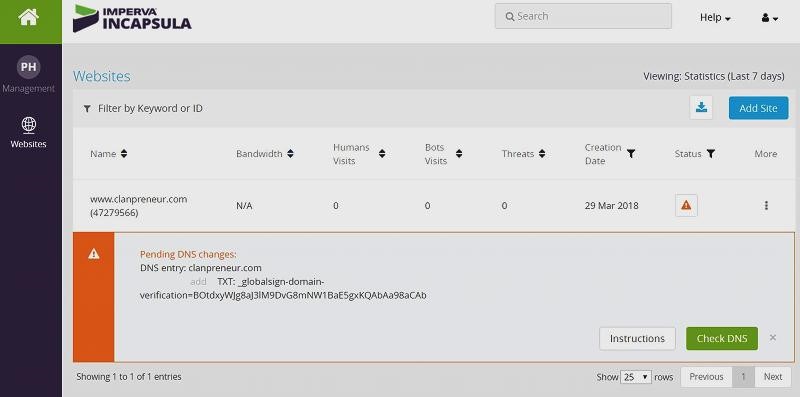
You then see the scary screen below, where you have to DO something.
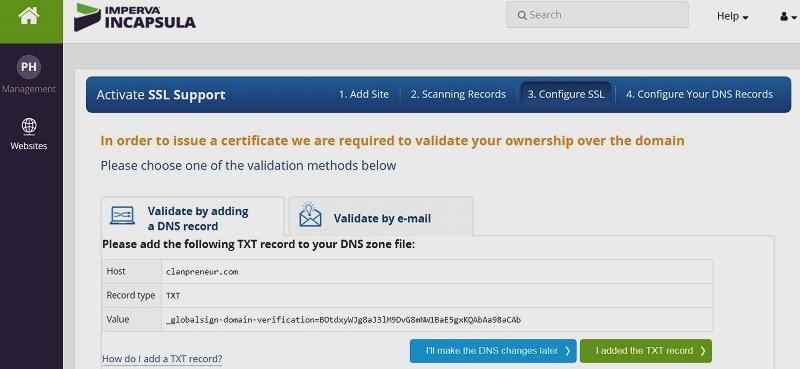
Validate by e-mail sounds easier, so click that box.
You now have a drop-down choice of email addresses to choose from.
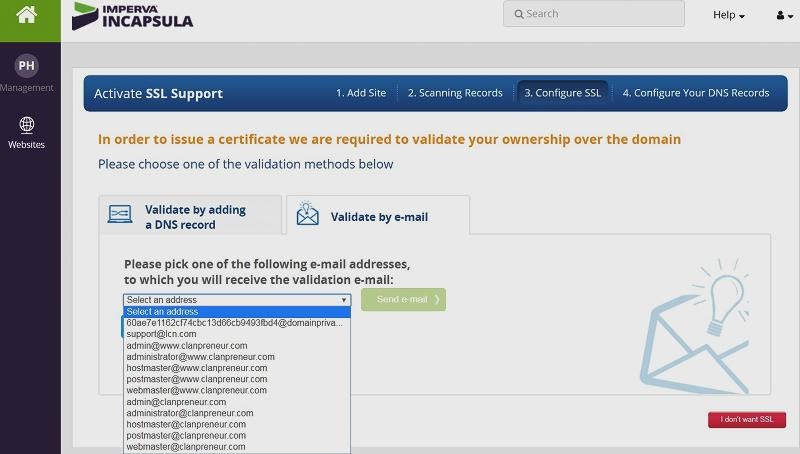
You probably don’t have any of those addresses set up, so you need to set one up in your cPanel dashboard. (If you do have one of these email addresses set up you can skip the next few steps.)
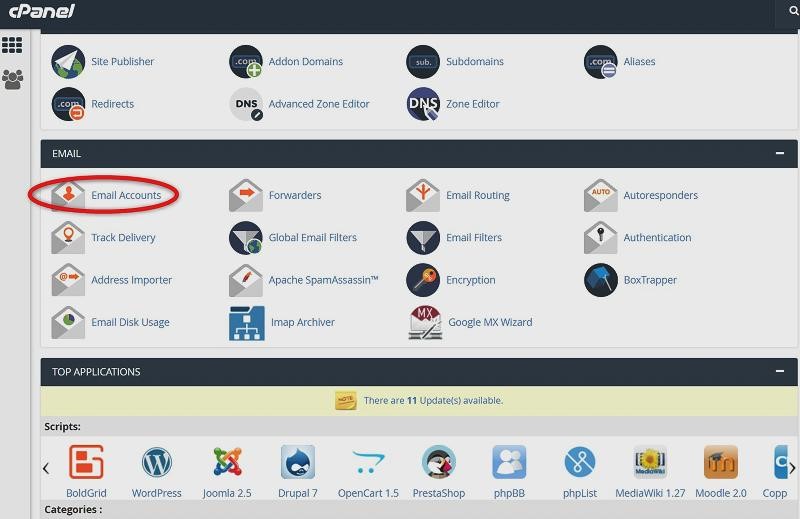
Scroll down through your cPanel screen until you reach the EMAIL section. Click the “Email Accounts” link. Scroll down the available email domains until you come to the one you need. Then add “admin” or your chosen email user and generate a password.

Be Sure to Copy Your Password
Click on the “eye” to see your password and copy it (Ctrl C). (This is a vital step!)
Press “Create Account.”
You will need to set up your new email account in whichever email client you use (Outlook, Thunderbird, etc.).
The screenshots below show how to set up your new account in Thunderbird. Download Thunderbird free from here.
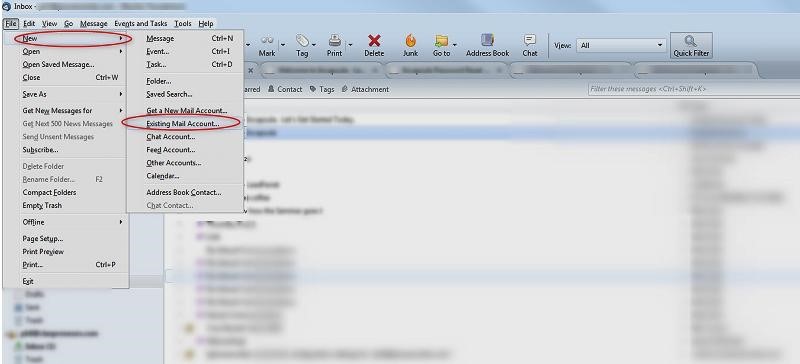
Click on File, New, Existing Mail Account, and a pop-up will appear as below.
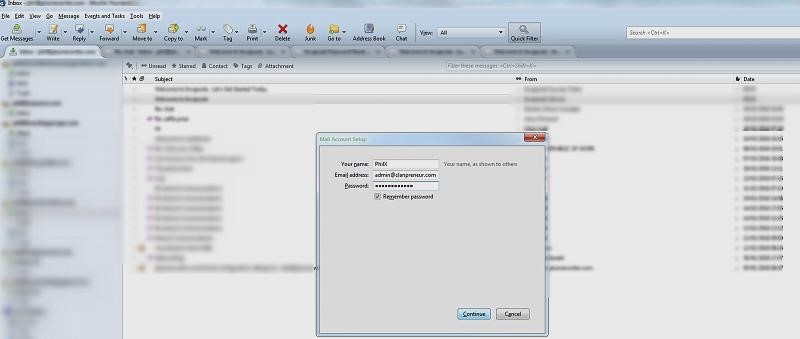
Put your name on the top line, your new email address in the second line, and paste your password (Ctrl V) into the third line. Click “Confirm,” and you are done.
Go back to your Incapsula browser tab.
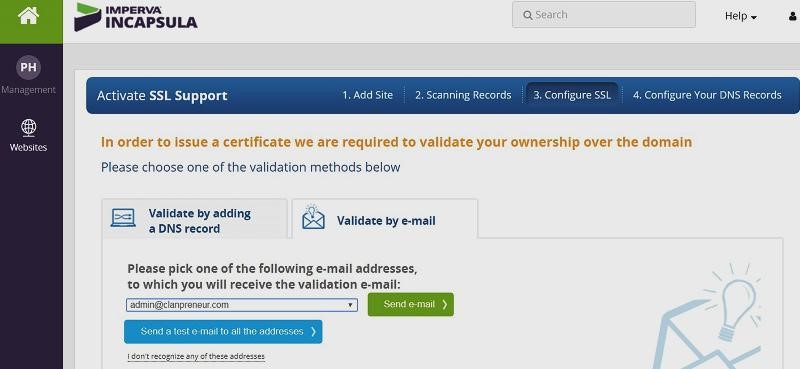
Choose the email address you have just set up and click the “Send email” link.
The screen below then opens up.
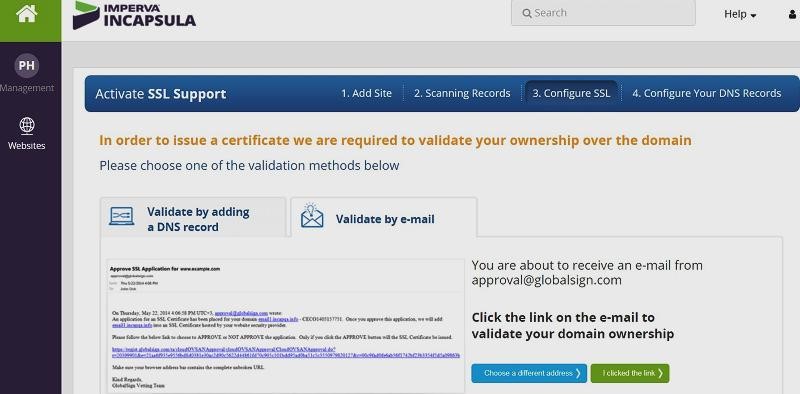
Open your email client, scroll down to the address you have given and open your inbox.
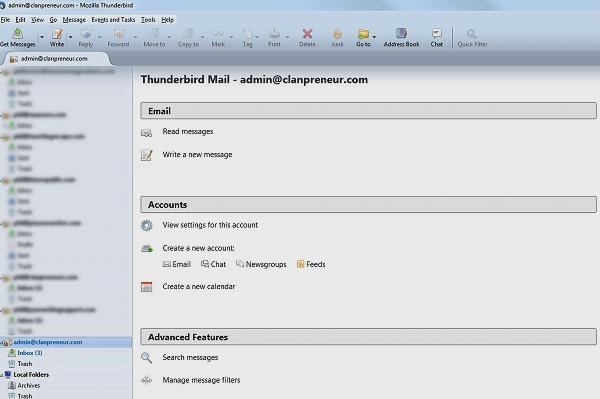
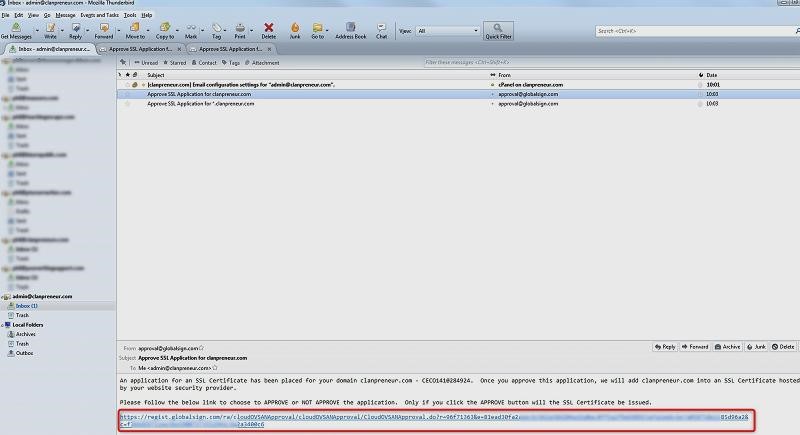
Open the email from Incapsula and click the link.
And Now You Wait…
You must wait a few hours until the SSL certificate is issued before you can go on to the next step.
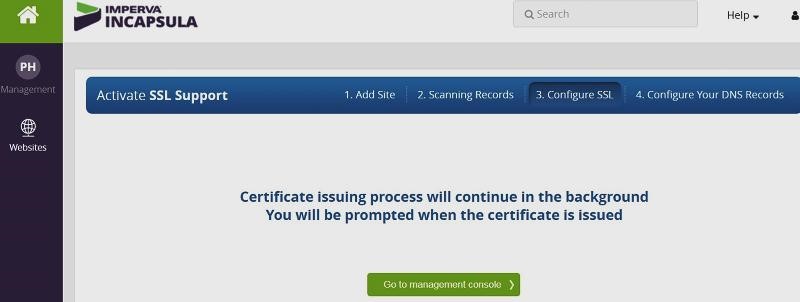
When you click on the “Go to management console” button, you see the screen below.

That’s it for now. Go and do something else for a few hours, because you need an email from Incapsula before you can go to the next step.
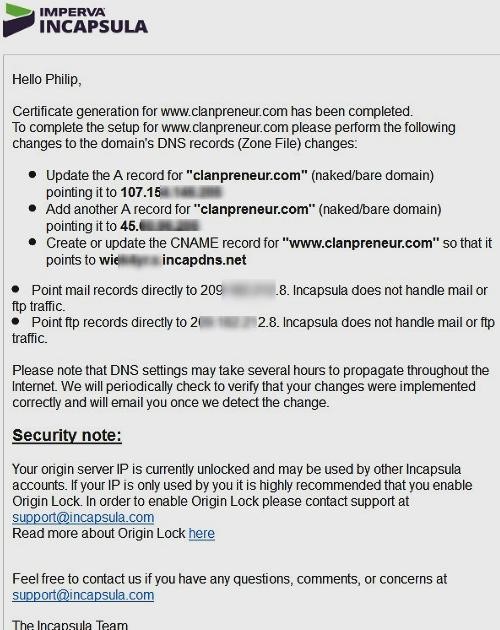
Eventually, you will get an email as shown below.
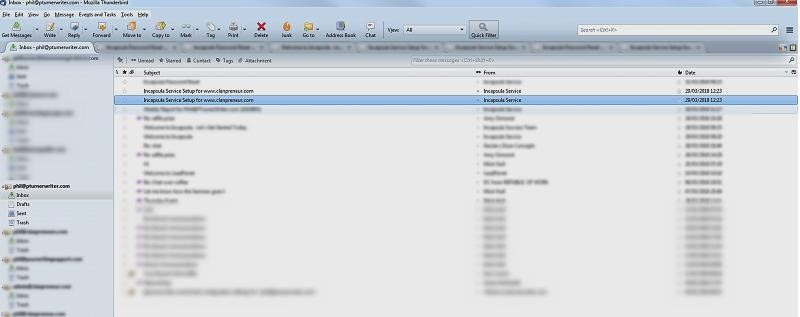
Open the email.
It’s Really Easier Than It Seems
This all sounds pretty complicated. Don’t give up, though, because it’s easier than it seems.
Open your cPanel screen and scroll down until you find the “Domains” section. Click on the “DNS Zone Editor” link.
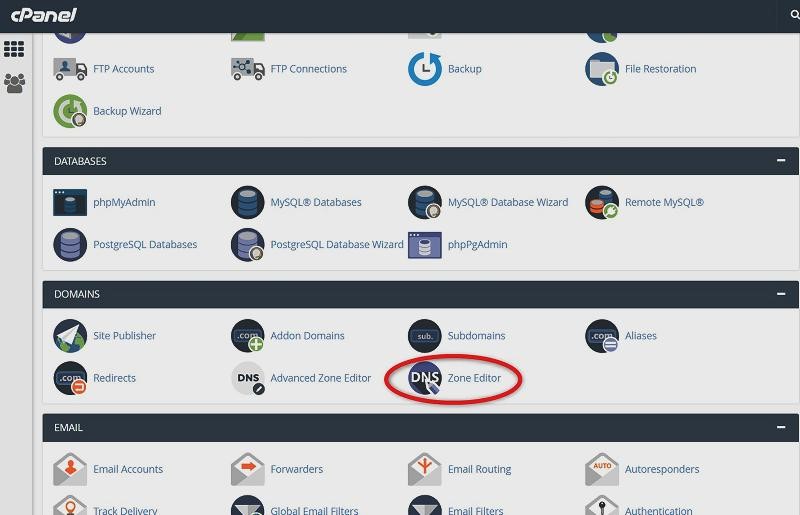
The DNS editor will open.
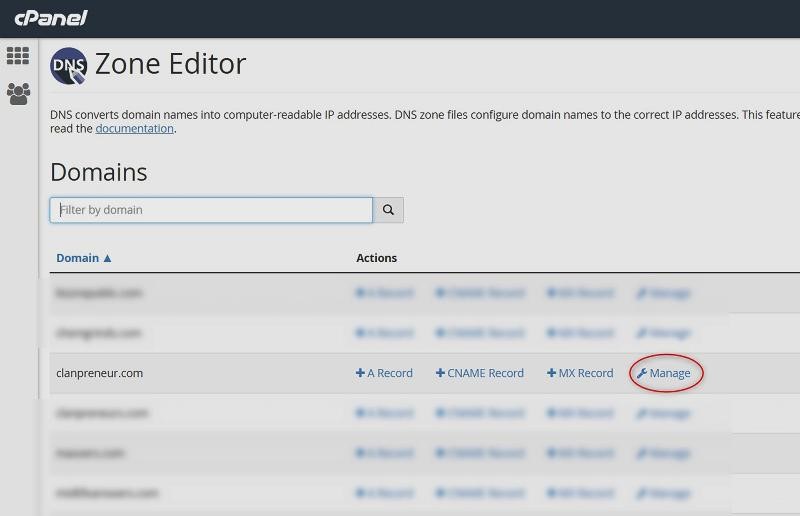
Find the domain you are setting up on Incapsula and click the “Manage” link.
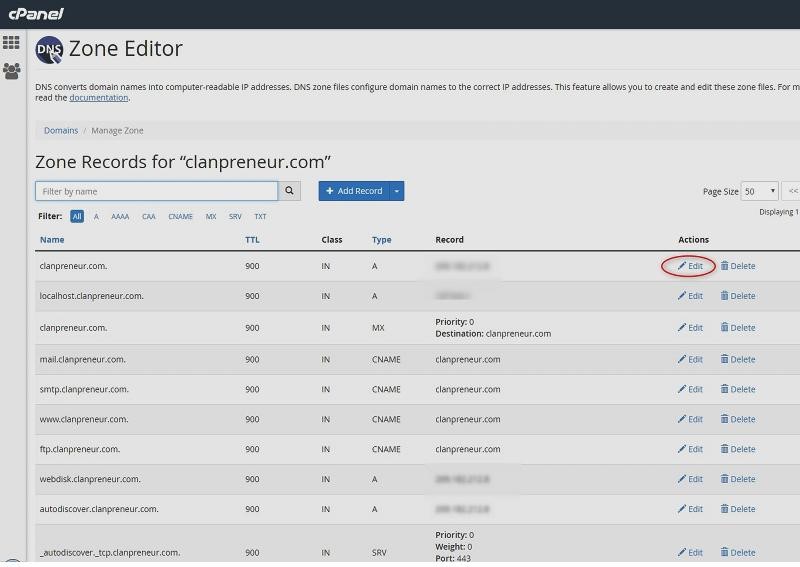
You are now ready to change the “A record.” Copy the new IP address from the recent Incapsula email and click “edit” as shown below.
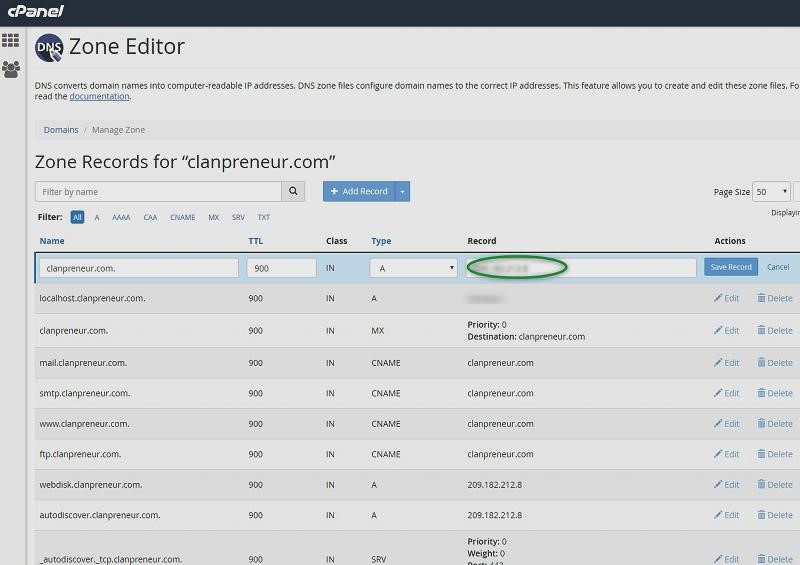
Click “Save Record.”
You will get an acknowledgment screen saying you have updated the “A record” successfully.
Now, Add Another One
Now you get to add another “A record.”
Click on the “Add Record” button.
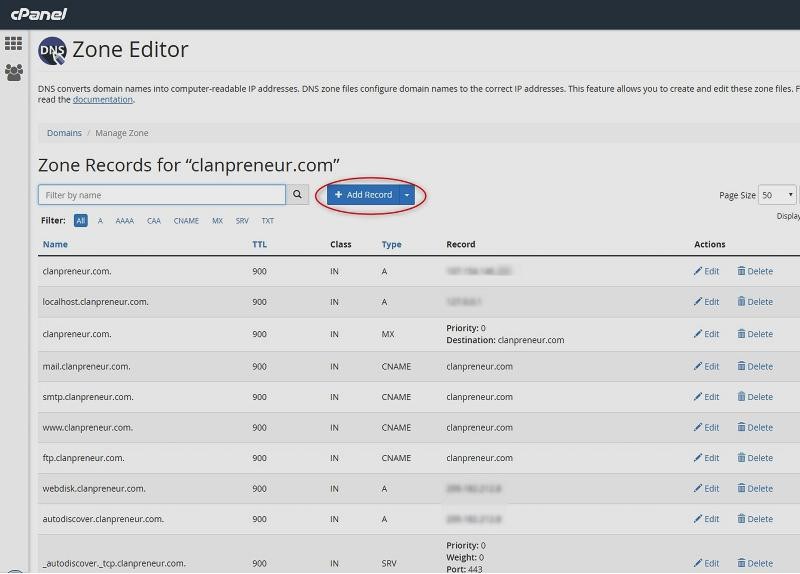
When you click, you will get the screen below.
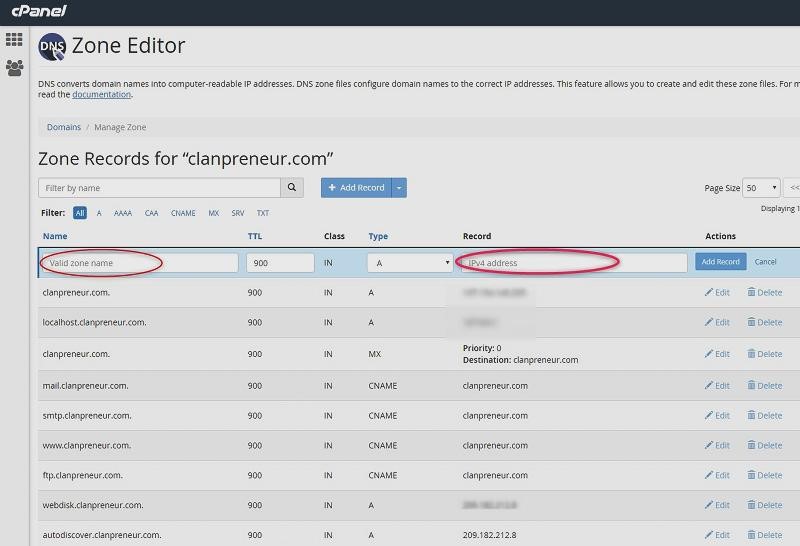
Paste in your naked domain name and the new “A record” IP address as shown below, then click the “Add Record” button.
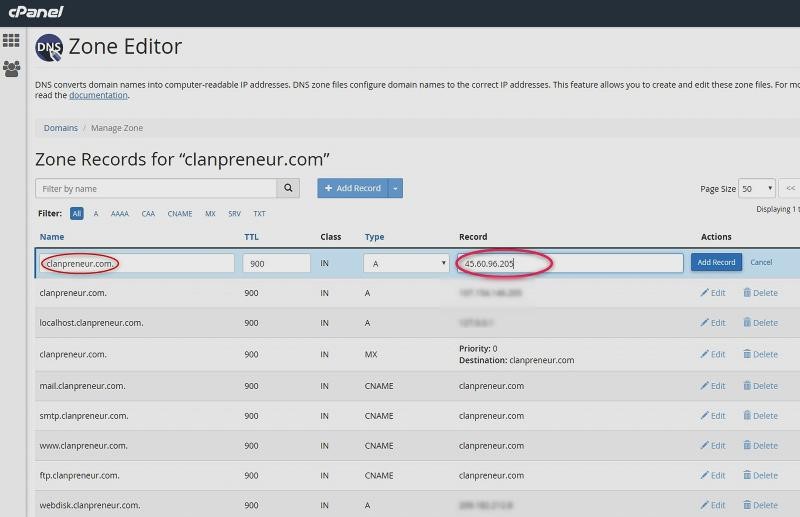
Well done. You have now completed two of the three DNS changes. (DNS, by the way, stands for Domain Name System.)
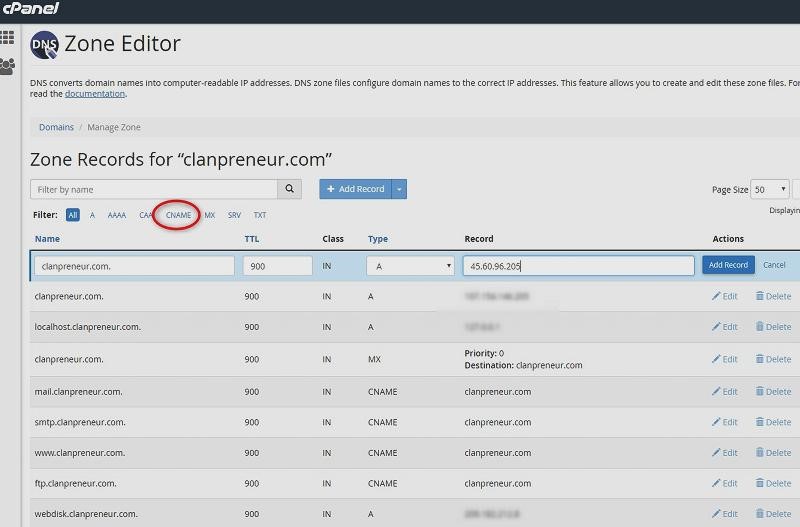
Your next step is to change the CNAME record.
Click the CNAME link, as below.
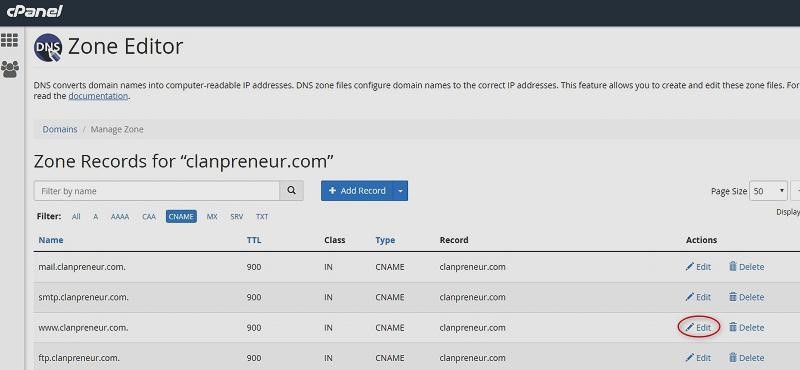
Follow the email instructions and click “Edit” for the domain.
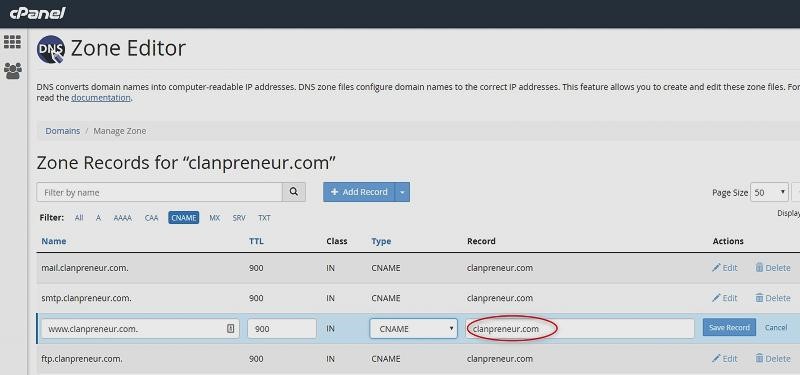
You will see the screen below. You are going to replace the highlighted domain in the “Record” column with whatever your Incapsula email said to use.
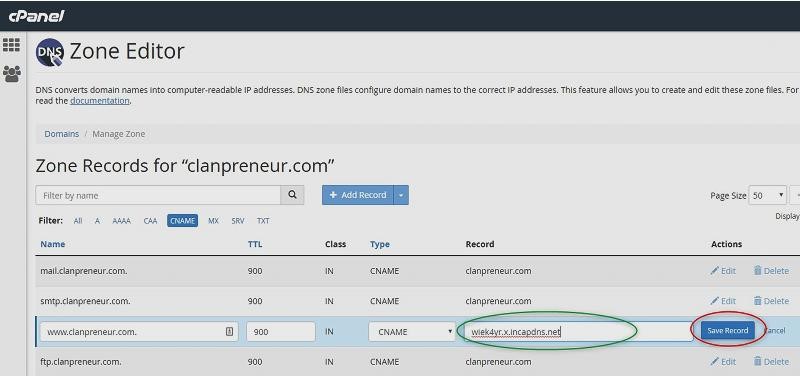
Paste in the new CNAME record from your email and click “Save Record.”
Practice Patience
You’ve finished, but the changes you have just made will take up to 48 hours to propagate, so Incapsula still marks your domain as “not configured.”
The next day or the day after, you will receive an email as shown below.
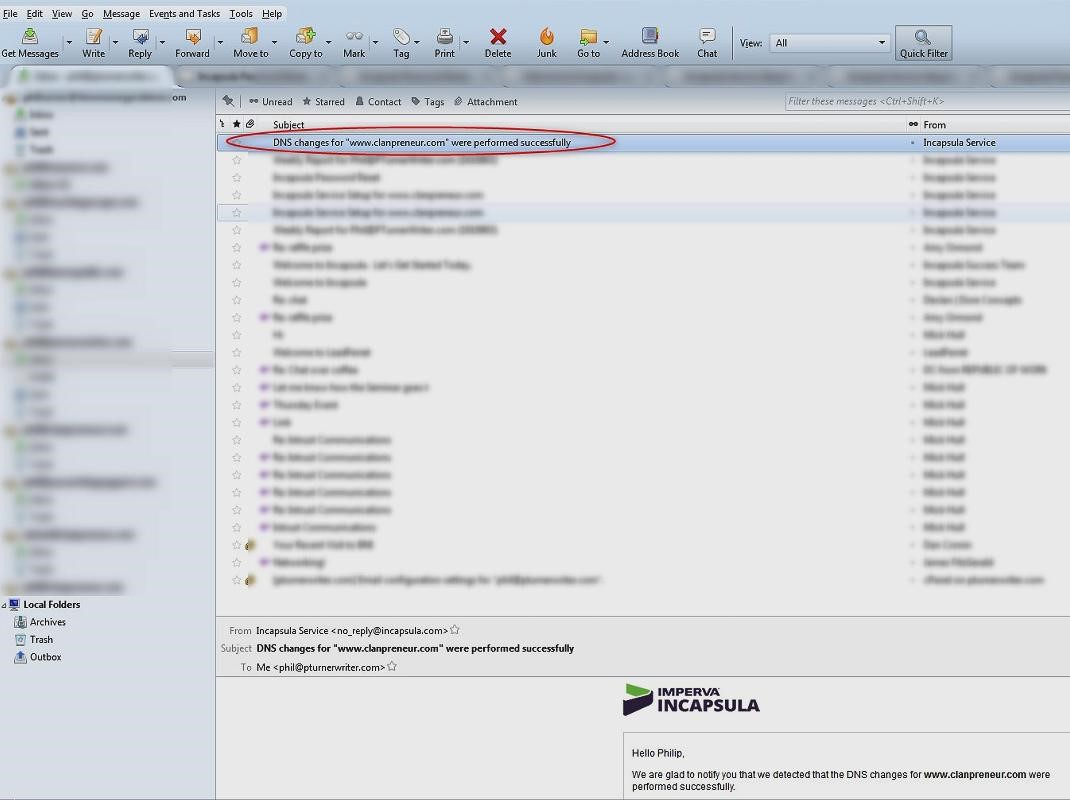
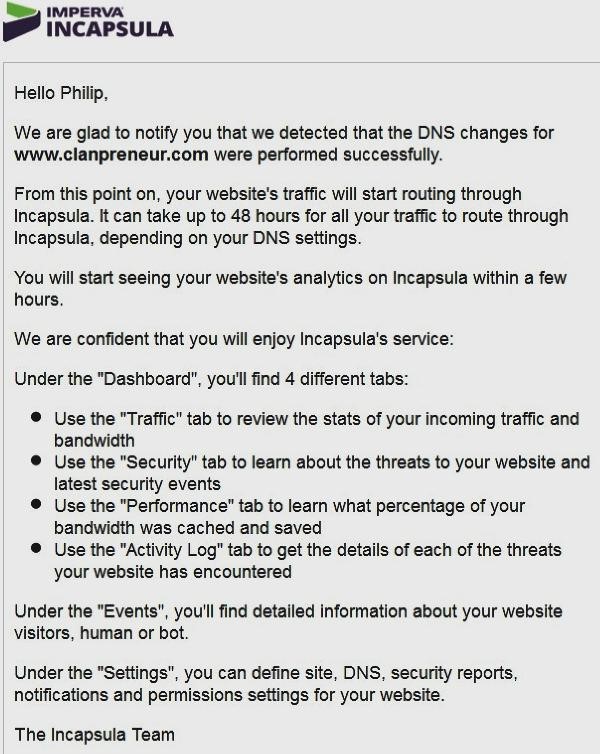
When you open the email, you find everything is in order.
When you log in to Incapsula again, you should see a screen similar to the one below.

That happy green check mark tells you your DNS changes have propagated. Now all your traffic will go through your Incapsula CDN.
RELATED ARTICLE: 2 SIMPLE WAYS TO HELP YOUR IT DEPARTMENT HELP YOUR BUSINESS
Long Story Short
You need a content delivery network to stay one step ahead of your competitors. Your website needs to lead the pack in every way, including design, interactivity, and speed. A quality CDN is part of that.
So choose your CDN carefully. You don’t need a perfect Eggs Benedict. All you want is a poached egg on toast, so choose one that is simplicity itself to implement. Incapsula’s CDN is one of the simplest to set up, as you can see from the series of screenshots above.
[ad_2]
Source link
Leave a Reply